Ultrasound imaging is an indispensable tool in veterinary medicine, offering real-time visualization of internal structures without the need for invasive procedures. However, the quality of the images obtained can significantly impact diagnostic accuracy. Optimizing ultrasound images involves a combination of proper equipment settings, patient preparation, and operator technique. This article provides a comprehensive guide to enhancing ultrasound image quality in veterinary practice.
1. Understanding Ultrasound Imaging Basics
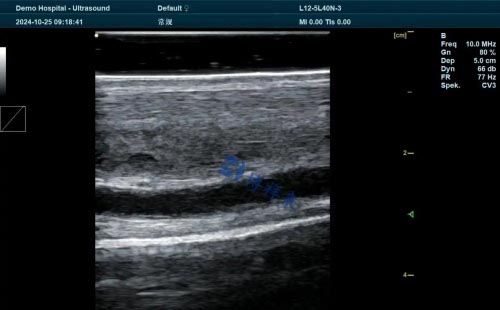
Ultrasound machines generate images by emitting high-frequency sound waves through a transducer. These waves penetrate the body and reflect off tissues, creating echoes that the machine interprets into visual images. The quality of these images depends on several factors, including the frequency of the sound waves, the depth of penetration, and the acoustic properties of the tissues.
2. Selecting the Appropriate Transducer
Choosing the right transducer is crucial for obtaining optimal images. Transducers come in various shapes and frequencies, each suited for specific applications:
Linear Transducers: Ideal for superficial structures due to their high frequency and resolution.
Curvilinear Transducers: Suitable for abdominal imaging, offering a wider field of view.
Phased Array Transducers: Used for cardiac imaging, allowing for imaging between ribs.
Selecting a transducer with the appropriate frequency and footprint for the target organ or structure is essential.
3. Adjusting Frequency and Depth
The frequency of the ultrasound waves affects both image resolution and penetration depth:
High Frequency (10–15 MHz): Provides superior resolution but limited depth penetration. Suitable for imaging superficial structures like tendons and superficial masses.
Low Frequency (2–5 MHz): Offers greater depth penetration with reduced resolution. Ideal for imaging deeper structures such as the liver or kidneys.
Adjusting the depth setting ensures that the area of interest occupies the majority of the screen, enhancing image detail and diagnostic capability.
4. Optimizing Gain and Time Gain Compensation (TGC)
Gain controls the brightness of the ultrasound image by amplifying the returning echoes:
Overall Gain: Adjusts the brightness of the entire image.
Time Gain Compensation (TGC): Allows for selective adjustment of brightness at different depths, compensating for attenuation of sound waves as they penetrate deeper tissues.
Proper gain settings are essential to differentiate between tissues of varying echogenicity and to avoid artifacts that can obscure diagnostic information.
5. Ensuring Proper Contact and Coupling
Adequate contact between the transducer and the patient's skin is vital for effective transmission of sound waves:
Hair Removal: Clipping the hair over the area of interest reduces air interference.
Use of Coupling Gel: Applying an appropriate amount of ultrasound gel eliminates air gaps and facilitates sound wave transmission.
Poor contact can result in image artifacts and reduced image quality.
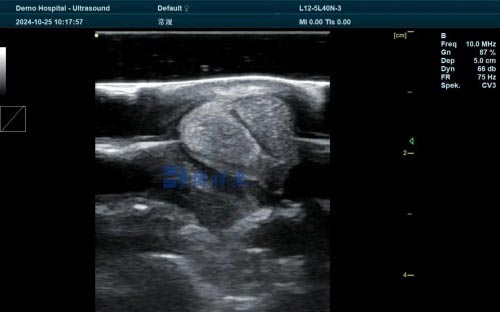
6. Utilizing Focal Zones
Focal zones enhance image resolution at specific depths:
Adjustable Focal Zones: Positioning the focal zone at or just below the area of interest sharpens image clarity.
Some ultrasound machines allow for multiple focal zones, but increasing the number may reduce frame rate. Therefore, it's important to balance image resolution with temporal resolution based on the clinical scenario.
7. Minimizing Artifacts
Artifacts can obscure or mimic pathology, leading to misinterpretation:
Reverberation: Occurs when sound waves bounce between two strong reflectors. Adjusting the angle of insonation can help reduce this artifact.
Shadowing: Caused by structures that strongly absorb or reflect sound waves, such as bones or calculi. Recognizing and interpreting these artifacts correctly is essential.
Mirror Image: Results from sound waves reflecting off strong interfaces, creating duplicate images. Changing the transducer position can help identify and eliminate this artifact.
Understanding and identifying common artifacts enable accurate image interpretation and diagnosis.
8. Regular Equipment Maintenance
Routine maintenance of ultrasound equipment ensures consistent image quality:
Transducer Care: Regularly inspect for cracks or damage and clean according to manufacturer guidelines.
Software Updates: Keep the ultrasound machine's software up to date to benefit from the latest features and improvements.
Calibration: Periodic calibration ensures the accuracy of measurements and image quality.
Proper maintenance extends the lifespan of the equipment and maintains optimal performance.
9. Continuous Education and Training
Staying updated with the latest ultrasound techniques and best practices enhances diagnostic capabilities:
Workshops and Seminars: Participate in hands-on training sessions to refine scanning techniques.
Online Resources: Utilize online tutorials and courses to stay informed about advancements in ultrasound technology.
Peer Collaboration: Engage with colleagues to share experiences and insights, fostering a collaborative learning environment.
Continuous education ensures proficiency and confidence in performing and interpreting ultrasound examinations.
Conclusion
Optimizing ultrasound image quality in veterinary practice is a multifaceted process involving appropriate equipment selection, meticulous technique, and ongoing education. By understanding and adjusting factors such as transducer choice, frequency, depth, gain, and focal zones, veterinarians can significantly enhance diagnostic accuracy and patient outcomes. Regular equipment maintenance and commitment to continuous learning further contribute to the effective use of ultrasound as a diagnostic tool.
References:
"A Few Simple Steps to Image Optimisation," Vet Image Solutions. https://www.vetimagesolutions.co.uk/blog/simple-image-optimisation-tips
"Improve Your Ultrasound Image in 4 Easy Steps," BCF Ultrasound. https://www.bcfultrasound.com/improve-your-ultrasound-image-in-4-easy-steps/
"Getting The Most From Your Ultrasound," Cave Veterinary Specialists. https://www.cave-vet-specialists.co.uk/veterinary-professionals/tips-from-our-experts/getting-the-most-from-your-ultrasound
"How to Optimize Your Ultrasound Image," Choice Medical Systems. https://choicemedical.com/how-to-optimize-your-ultrasound-image/
"Ten Top Tips in Veterinary Small Animal Abdominal Ultrasound," British Medical Ultrasound Society. https://www.bmus.org/education-and-cpd/cpd-resources/top-tips/ten-top-tips-in-veterinary-small-animal-ultrasound/

