When you’re working with animals—whether it’s at a rural farm, a busy equine clinic, or a swine breeding station—the last thing you want is for your ultrasound machine to go silent during a critical scan. Yet, like all electronic tools, Veterinary ultrasound machines can develop glitches, from unresponsive probes to blurry images or total power failure. Knowing how to approach these issues calmly and logically can save time, money, and, more importantly, animal lives.
")
Let’s walk through how experienced veterinarians and technicians approach ultrasound malfunctions. This guide combines common-sense methods, field-tested habits, and a few things you won’t find in the user manual.
Step One: Rule Out the Obvious First
Sounds basic, but most ultrasound issues are caused by minor oversights.
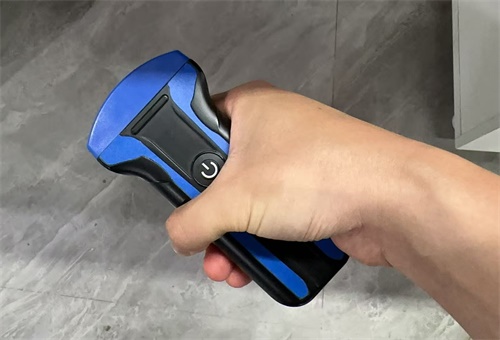
Start with power. Is the machine fully charged or plugged in securely? On some models, like portable handheld units used on cattle farms, a loose charging cable or drained battery is more common than you’d think—especially in cold barns or dusty environments.
Next, check the probe connection. Many units use a locking cable that snaps into the probe port. If it’s not fully engaged, the machine might boot up fine, but you’ll see a black screen or static instead of an image. Simply reseating the probe can often solve the problem.
Step Two: Read the Room—Literally
Environmental factors play a huge role in how your ultrasound performs.
Cold temperatures can interfere with LCD screens, making them lag or show distorted images. Keep the machine warm during winter fieldwork.
Dust and debris—especially in swine or sheep operations—can accumulate around ventilation slots. If your machine feels hot or starts shutting down randomly, overheating might be the issue. A simple cleaning with compressed air can help.
Moisture exposure, even from humidity, can affect probe conductivity. If you're scanning near water troughs or in rainy barns, wipe down equipment thoroughly and let it acclimate to the room before use.
Step Three: Evaluate Image Quality
Let’s say your machine powers on fine, but the image is blurry, noisy, or downright unreadable.
Here’s a quick breakdown of what the issue might be:
| Symptom | Possible Cause | Quick Fix |
|---|---|---|
| Fuzzy or pixelated image | Wrong depth/gain setting | Adjust gain, focus, and depth manually |
| Shadowing or streaks | Gel dried on probe, damaged lens | Clean probe tip carefully |
| No image at all | Probe failure or software glitch | Try a different probe if available; restart system |
| One side of screen blank | Element dropout (probe issue) | Needs deeper evaluation—may require repair |
If you’re using high-frequency probes for transrectal scans (common in cattle), remember that they’re more fragile than convex probes used on horses or swine. A tiny internal crack—unnoticeable to the eye—can distort the image.
Step Four: Software and Settings
Veterinary ultrasound machines, especially the advanced color models, run on embedded software that may misbehave after power surges or accidental button mashing.
Here’s what to do:
Factory reset: If the machine is acting unpredictable (e.g., freezing, slow response), locate the reset option in the settings menu. This won’t usually erase saved images but will restore default settings.
Firmware update: Some newer models like BXL-V50 allow firmware updates via USB or wireless. If your screen warns of outdated software, follow the manufacturer’s instructions or contact support.
Preset mismatch: Occasionally, the image problem lies not with the hardware but with the preset you’ve chosen. If you’re scanning a cow and using a canine abdomen setting, your image won’t look right. Always double-check.
Step Five: Try Another Probe
This is one of the fastest ways to isolate the problem. If your machine supports multiple probes and you have a backup linear, convex, or transrectal probe, try swapping them.
If the image returns to normal with the second probe, your original probe is likely damaged.
If both probes fail, the issue may be deeper—perhaps the probe port or motherboard is faulty.
Some systems even support automatic probe recognition, and if your machine fails to recognize a compatible probe, that’s a red flag pointing to either a firmware issue or a broken connector.
Step Six: Diagnostic Test Modes
Many machines include a built-in self-test function—something worth learning if you're operating alone in the field. These tools scan the machine’s processor, imaging board, and screen modules.
On the BXL-V50, for example, pressing and holding the “Menu” button for a few seconds during boot-up enters the diagnostic mode. You’ll get a status screen showing what’s working and what’s not. It's similar to how PCs run BIOS diagnostics.
Don’t worry if you’re not a techie—the interface is usually intuitive, with green checkmarks and red warnings. Just don’t ignore those red icons!Step Seven: Physical Inspection
If the problem persists, turn your attention to the machine’s body:
Look for cracks in the probe head, worn cables, or broken keyboard buttons.
Inspect the screen from multiple angles. If there’s flickering or color bleeding, it might be a screen issue rather than a probe one.
Listen for internal sounds. A failing fan or a clicking hard drive (on older systems) might suggest hardware failure.
Don’t attempt to open the machine unless you’re trained. Internal components are delicate and improperly resealing a unit can void the warranty or compromise waterproofing.
Step Eight: Call Support—but Be Prepared
Before you reach for the phone or submit a support ticket, gather the following:
Machine model and serial number
Description of the problem
Photos or videos of the screen during malfunction
Any error messages displayed
Steps you’ve already tried
This will save you from going in circles with technical support and help the technician pinpoint the issue faster.
Some brands, including Boxerly, offer remote diagnosis via Wi-Fi connection. If you're using a cloud-enabled model like the BXL-V50, technicians might be able to run tests or update software remotely—something that's become a game-changer for remote users.
Long-Term Tips to Avoid Downtime
Preventing problems is always better than fixing them. Here’s how technicians and field users keep their machines healthy:
Regular cleaning of the probe head and machine body
Safe storage, especially avoiding hot car trunks or damp barns
Routine firmware checks every 3–6 months
Avoid dropping or hitting the probe during farm work—common but avoidable
Train all users properly, especially with multiple hands using the same unit across shifts
When to Send It In
If you’ve ruled out user error, tried different probes, and run a diagnostic—all with no luck—it’s time to send the unit in.
Look for these clear signs:
Boot failures (black screen)
Cracked probe head
Display errors that don’t resolve with reset
Repeated freezing or sudden shutdowns
Most manufacturers will provide a loaner device if your machine is under warranty. Plan ahead by keeping a basic back-up machine onsite—even a black-and-white model—for emergencies.
Final Thoughts
Troubleshooting an ultrasound machine isn’t just about tech-savvy skills—it’s about understanding how your daily working environment, handling habits, and even animal behavior can influence equipment performance. The more familiar you are with your machine’s typical sounds, image quality, and behavior, the faster you’ll notice when something’s off.
Don’t panic. Step back, check the basics, isolate the problem, and lean on support when needed. That’s how most experienced livestock vets and technicians handle it—and why their equipment almost always gets back to work quickly.